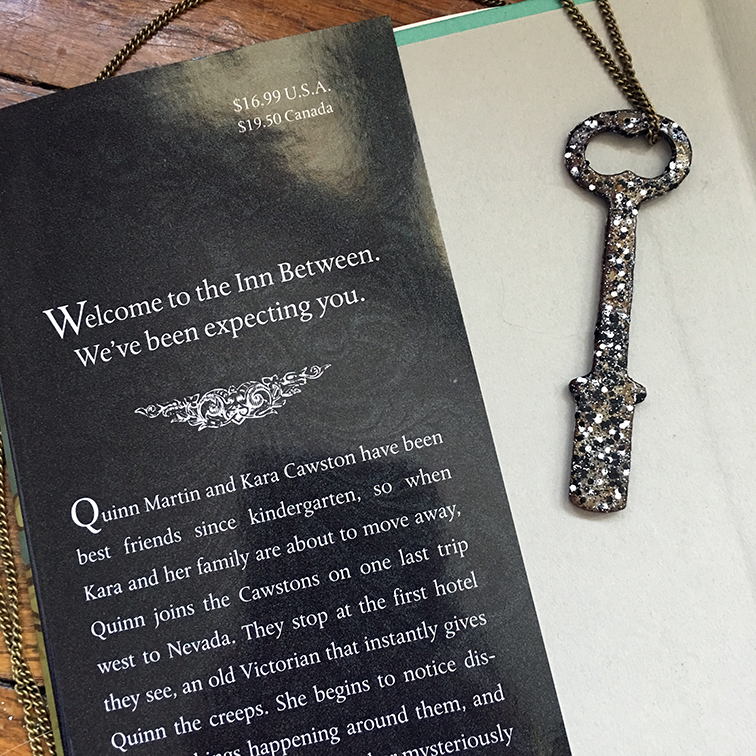
DIY Skeleton Key Necklace
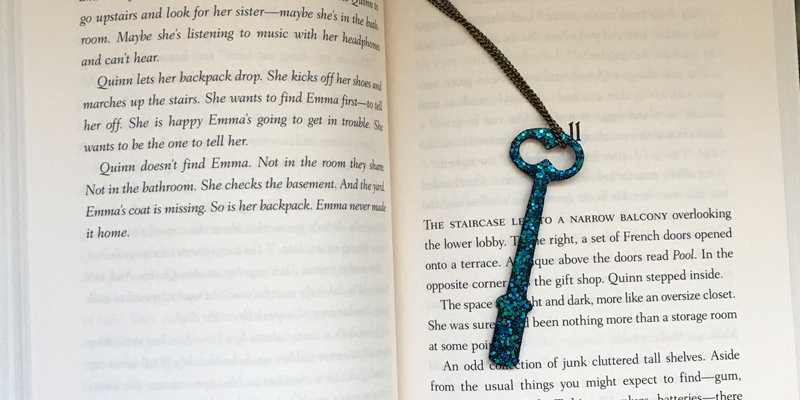
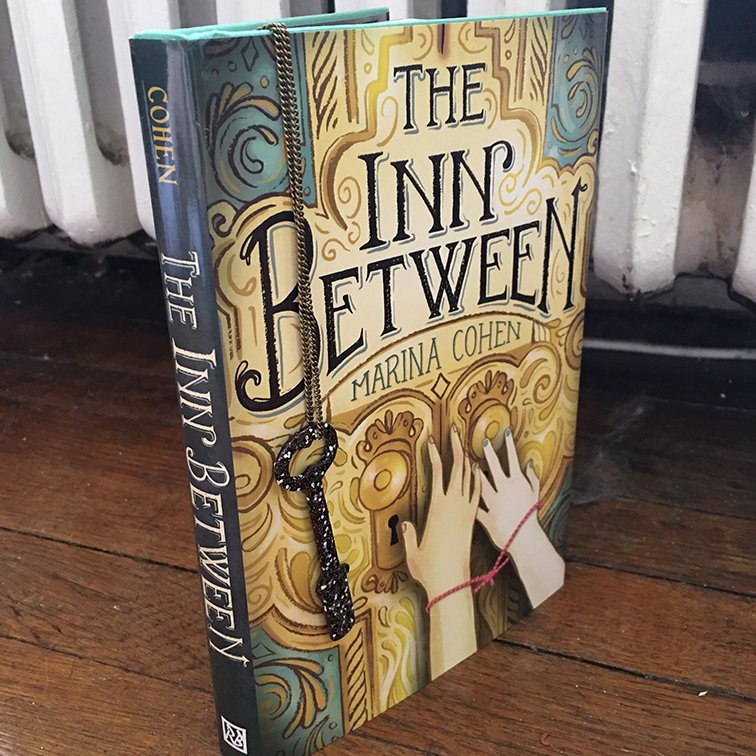
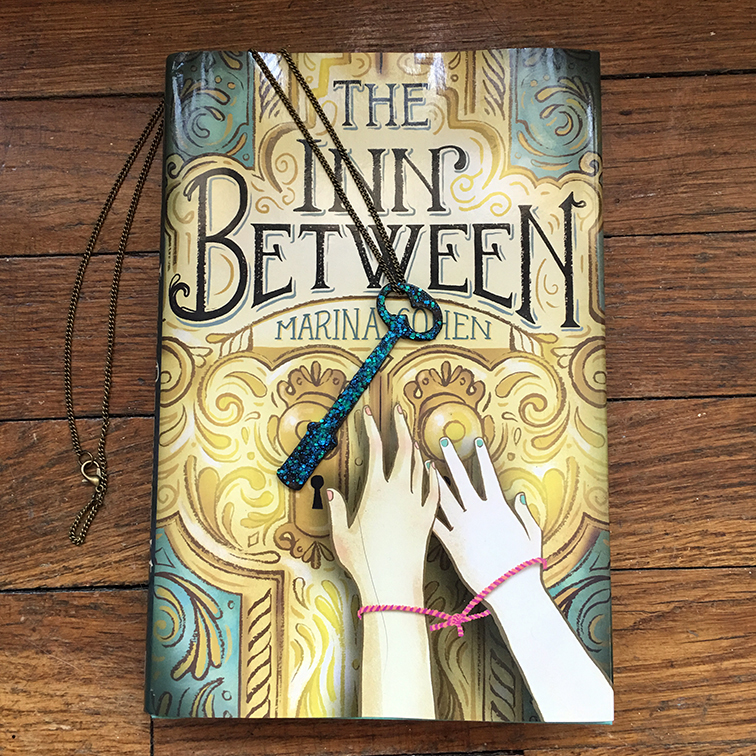
Like we mentioned last week, we recently read a book called “The Inn Between” by Marina Cohen that was so great, we just couldn’t stop thinking about it long after we were done reading. The book takes place in a spooky old hotel, complete with skeleton keys for each door, which totally made us obsess over how awesome rusty, vintage keys really are – and thus our very first book inspired craft was born!
How to make a DIY Skeleton Key Necklace:
What You’ll Need:
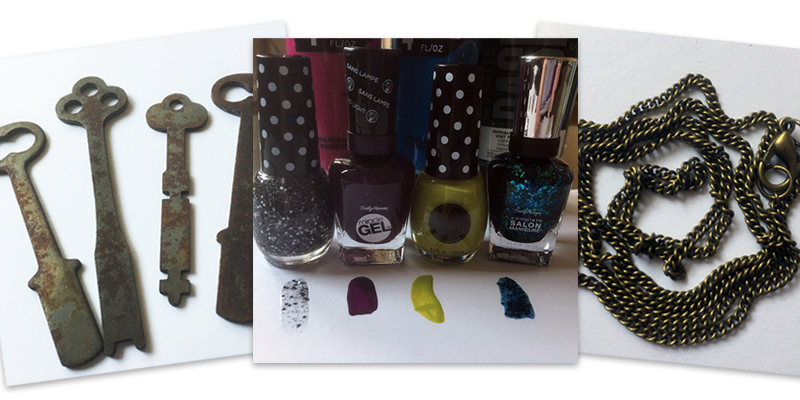
– At least 1 skeleton key (or other old, vintage key)
– At least 1 bottle of nail polish
– A chain (we went with bronze to keep with the vintage feel)
– At least 1 jump ring (optional)
Instructions:
1. Lay out an old tablecloth, newspapers, or some other way to keep your workspace clean. You definitely don’t want to get nail polish all over your stuff!
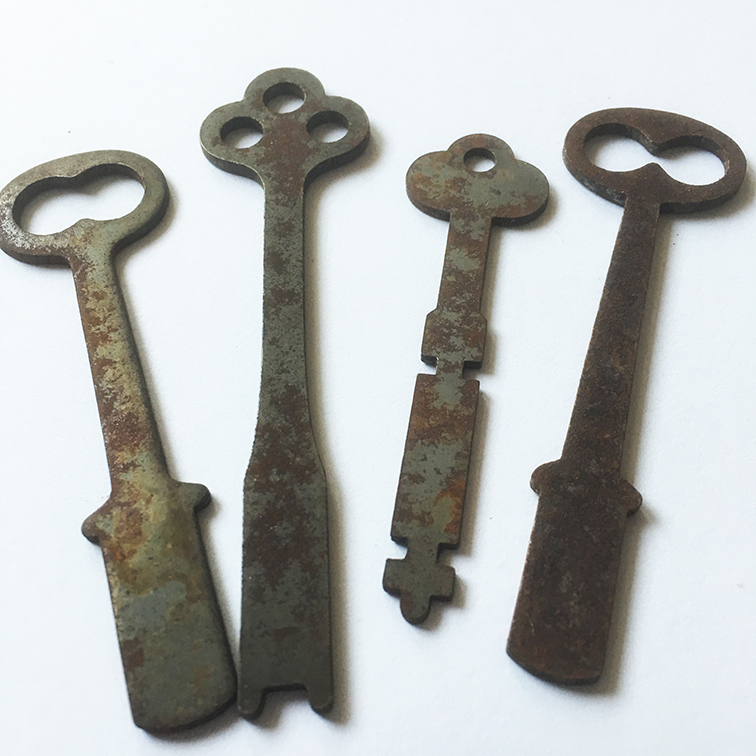
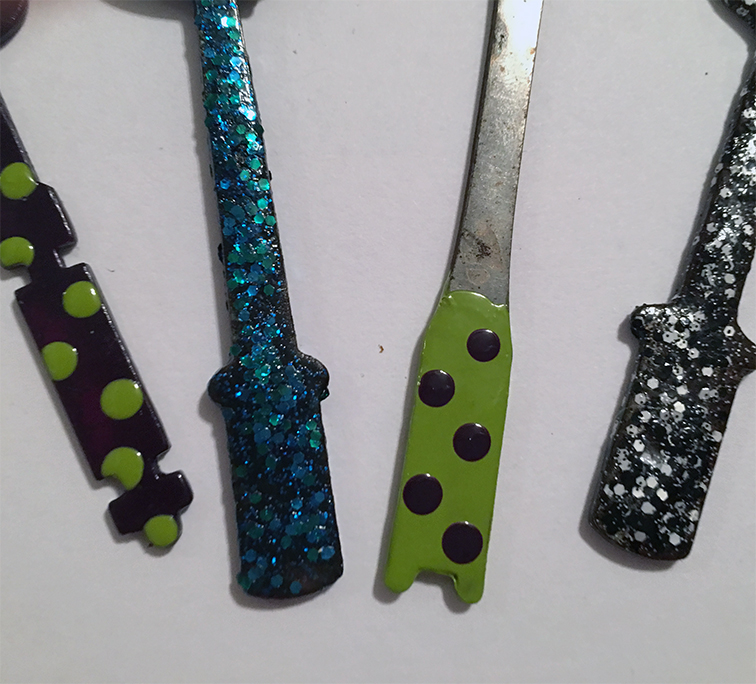
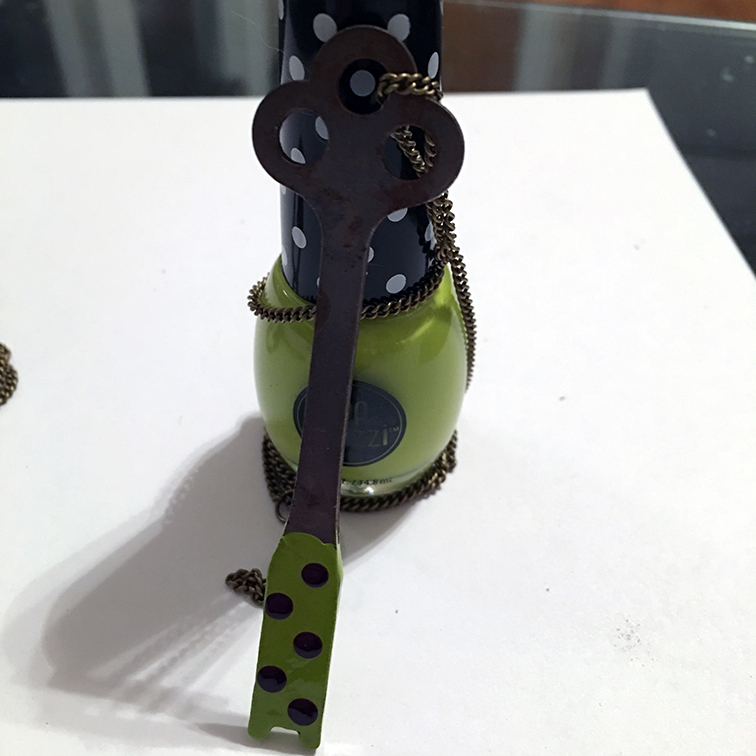
2. Choose the key you’d like to paint. The more traditional skeleton keys generally look the coolest, but the ones with the flat ends (see above) leave more room for fun designs. You can also do this with normal house keys, your locker key, or whatever other random keys you have lying around.
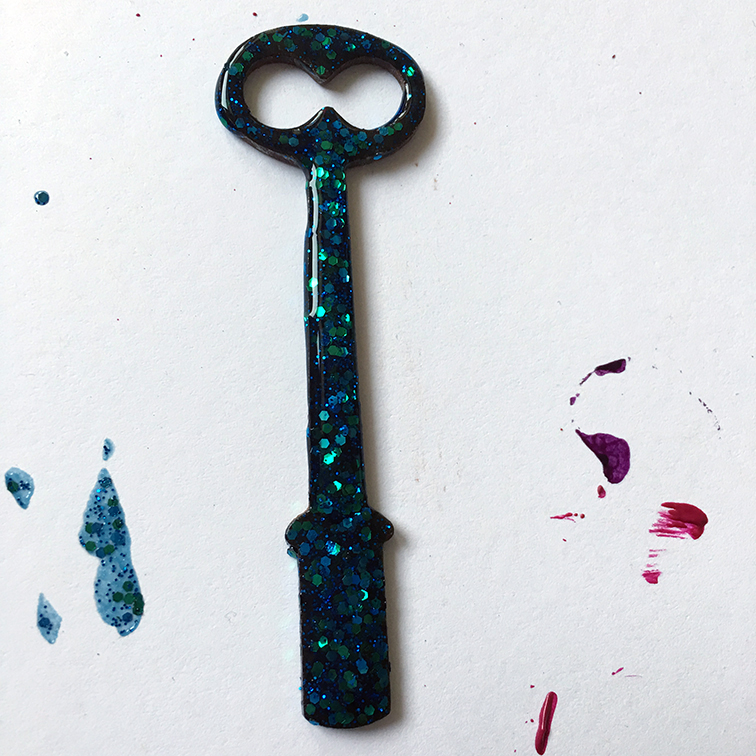
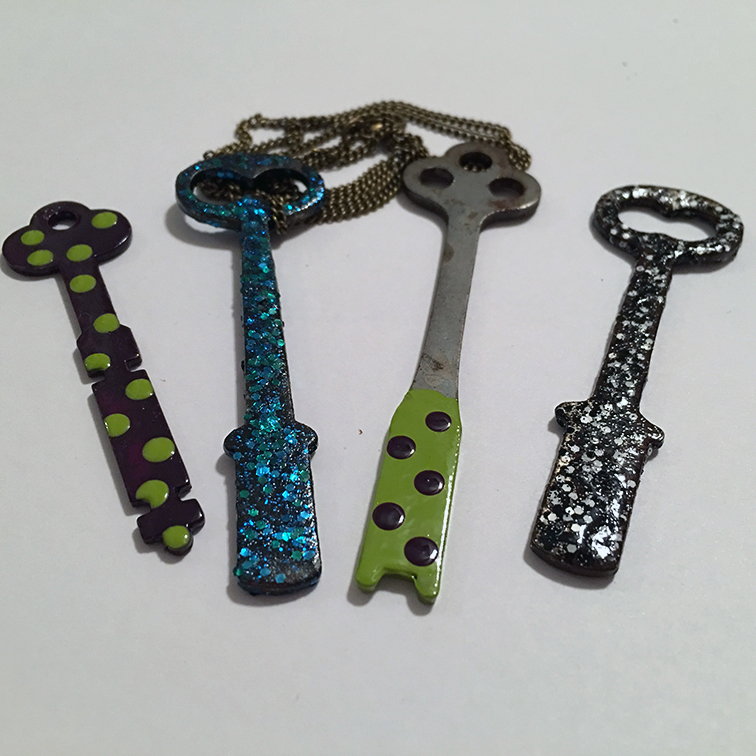
3. Grab your nail polish, and get to painting! (Don’t use your older sister’s fancy expensive colors, just in case you end up using a lot!) We experimented with glitter nail polish and found that not only does it look great, we actually liked it even better than the solid colors.
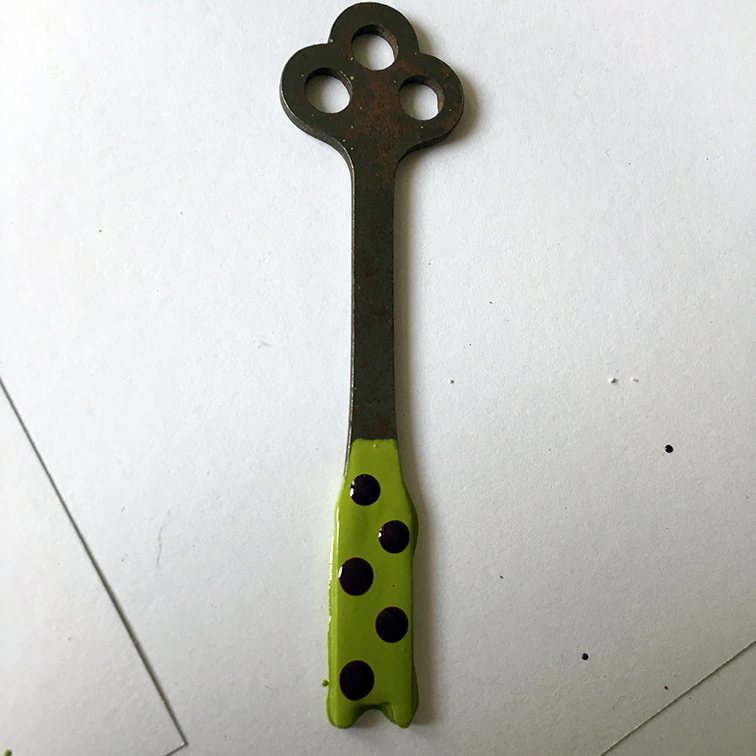
You can paint the entire key or just a small portion of it. For lighter colors, you may need a few coats. Don’t forget to paint around the edges, or it will look super funky, and not in a good way.
3. Let it dry. Nail polish dries pretty quickly, but it stays tacky-ish for longer than you’d expect. We suggest 1-2 hours, but you can gently touch them to see if they’re ready sooner.
We found they dried great on a windowsill at night when the breeze is cooler, or even with a fan blowing on them.
4. Repeat the process again if necessary to add additional designs (like stripes or polkadots) or to paint the other side of the key. Let it dry again. Now’s a good time to use that nail polish to actually do your nails, or maybe pick up a copy of “The Inn Between” and start reading?
5. Once everything is 100% dry, you can add the chain. Using a jump ring will allow the key to dangle and turn a bit more, but if you like yours to lay flat when you wear it, skip the jump ring and just loop the chain right through the key hole.
To add even extra flair, you can try tying little ribbons around the key, adding rhinestones, or any other little additions.
6. You’re done! Wear it proudly to the next school dance, your next hang with your bestie, or whenever else you think a totally awesome skeleton key necklace will suit your look.
Note: Since nail polish has a strong odor, you may want to leave your completed necklace to air out by a window for an extra day, to let the fumes die down a bit so you don’t pass out while wearing it.
If you liked this craft, try our Glowing Galaxy Jar DIY, and stay tuned for even more fun crafts in the future. Also, don’t forget check out our review of “The Inn Between” by Maria Cohen.